Set up User ID tracking in Matomo
User ID tracking in Matomo links visits, actions, and conversions to a single identifier so you can recognise the same user across sessions, devices, and browsers. The User ID setup and configuration depends on how Matomo is implemented: either through the JavaScript tracking code, Matomo Tag Manager, the WordPress plugin, or one of the Matomo SDKs.
This guide covers how to set up User ID tracking in Matomo using the JavaScript tracking code.
Before you start
- The JavaScript code must be added to your site pages with tracking active on your website or app.
- Your website should be set up to identify logged-in users, so the correct User ID is sent at login and cleared on logout. This requires a unique and persistent user identifier that represents each logged-in user.
- When any personal identifier, it is recommended to update your Matomo privacy settings to use a pseudonym to replace the User ID for enhanced privacy. The User ID pseudonym is processed using a salted hash function.
- If you operate in a region with privacy or consent requirements, ensure that sending User IDs is covered under valid consent before implementing this setup.
Add the User ID to the tracking code
When a visitor signs in to your website or app, Matomo needs to know which user the visit belongs to. The setUserId command must be included in your web page code right after successful user authentication occurs. This ensures all pageviews and actions are linked to that user’s identifier.
- Ensure your Matomo tracking code is placed within the
<head>tag of the page.
<!-- SAMPLE CODE DO NOT COPY -->
<script type="text/javascript">
  var _paq = window._paq = window._paq || [];
  _paq.push(['trackPageView']);
  _paq.push(['enableLinkTracking']);
  (function() {
    var u="YOUR_MATOMO_URL";
    _paq.push(['setTrackerUrl', u+'matomo.php']);
    _paq.push(['setSiteId', 'YOUR_SITE_ID']);
    var d=document, g=d.createElement('script'), s=d.getElementsByTagName('script')[0];
    g.type='text/javascript'; g.async=true; g.src=u+'matomo.js'; s.parentNode.insertBefore(g,s);
  })();
</script>
<!-- End Matomo Code -->
- After the user authentication process, add
setUserId:
<!-- Added only on pages where the user is logged in -->
<script>
  if (typeof _paq !== 'undefined') {
    _paq.push(['setUserId', username]);
  }
</script>
- The
setUserIddefines the data being sent and you need to configure the second argumentusernameto dynamically contain the unique User ID of the visitor currently viewing the page. - When no User ID is available, Matomo tracks the visit anonymously.
If your site uses server-side authentication (for example, PHP), you can dynamically insert and reset the User ID into the tracking code. Read the Matomo developer’s guide on managing User IDs.
Verify User ID tracking
After adding the User ID to your tracking code, verify that data is being sent and received correctly.
- Open your website, log in as a user and reload the page.
- In the browser developer tools (F12). Go to the Network tab and look for the request to
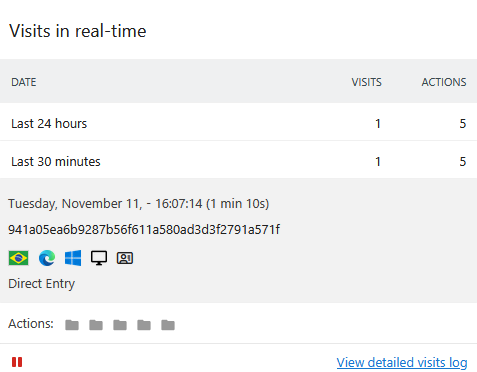
matomo.phpand confirm that the URL contains theuidparameter with your test User ID value. - Open Matomo and navigate to Visitors > Real-time.
- Your User ID should appear in the Visits in real-time report and view the Visitor Profile containing the User ID.
- To test tracking anonymous sessions, log out of your website and reload the page.
- Check in the browser developer tools > Network tab that no
uidparameter is included in the tracking request. - In Matomo, the visit should not appear under a User ID in the Visits Log and Visitor Profile.
Once User ID tracking is configured, you can measure customer engagement, compare logged-in and anonymous behaviour, and analyse user journeys across all Matomo reports. Use the Reporting API, create Segments, track conversions, and include the User ID dimension in Custom Reports.
Explore additional help topics in the User ID guide.
- What is User ID tracking?
- Benefits of User ID tracking
- User ID privacy considerations
- Analyse User ID reports