Create and manage session recordings
Before your users sessions will be recorded, you need to create a session recording. No developer knowledge is needed to configure session recordings and you don’t need to adjust the code on your website.
- In Matomo, go to Session Recordings > Manage Session Recording.
-
Use the Actions to manage session recordings, such as edit, stop, view, and delete a recording.

-
To record new sessions, click Create New Session Recording.
- To edit a session recording, click on the
 edit icon next to the name of an existing recording.
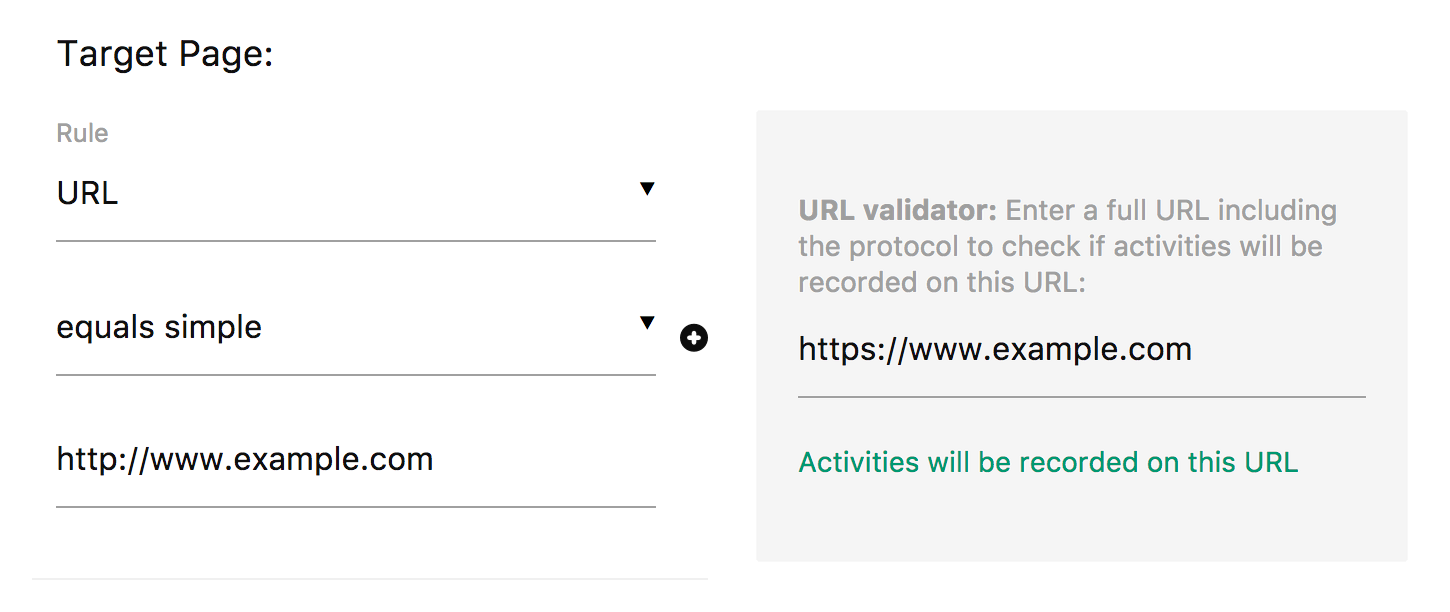
 - Define a name for the recording. That’s it. Optionally, you can choose to record activities only on a specific target page or target pages.
- To do this, you can choose between URL, URL path, URL parameter attributes and comparisons like
equals,starts with,contains,matches the regular expression, and many more. The validator next to your target page lets you easily test whether the page you want to match actually matches the Pages on which you want to record your users sessions.
Advanced options
When you configure a session recording, you can optionally define advanced options such as:
- record a session only if the user clicked and scrolled (Requires activity).
- record only sessions if they have spent at least a certain time on your web page (Min Session Time).
- disable the recording of keystrokes that user enter into text form fields (Capture keystrokes).
- define how many sessions should be recorded (Number of sessions).
- how likely a user should be recorded (Sample Rate).
Notify me when a Session Recording completes
From version 5.5.0 of the Heatmaps & Session Recording plugin, you can enable email notifications from Matomo when your Session Recordings have finished collecting data.
- Go to Administration
 > Personal > Settings.
 - Scroll to the HeatmapSessionRecording section.
- Select the option, Notify me when a heatmap or session recording has finished collecting data.

- Matomo will send the notification using the email address saved in your personal settings.
This helps you stay informed when enough data has been collected, making it easier to review insights when they are ready for analysis.