Create and manage Custom Alerts
Custom Alerts help you stay informed about important changes on your site without the need for daily data checks. You can configure alerts for any report to notify you when specific conditions are met.
Are you using Matomo On-Premise or Matomo for WordPress? To get started, make sure the free CustomAlerts plugin is installed in your Matomo. Using Matomo Cloud? This feature is activated automatically.
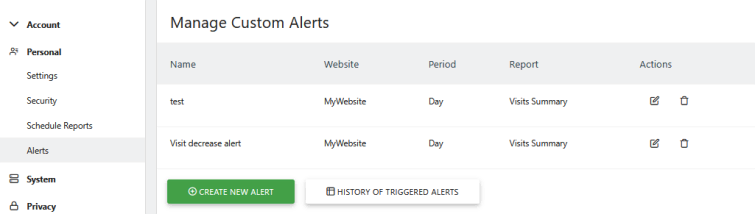
Manage your Custom Alerts
-
Log in to Matomo and go to Administration
 > Personal > Alerts.
-
You can create new alerts, use the edit icon to modify an existing alert, or click the delete icon to remove an alert.
How to create a Custom Alert
- In Personal > Alerts, click Create New Alert.
- Provide a name for the Alert.
- In the Apply To dropdown, choose the Website for the alert. Note: a custom alert is active for one website.
- Choose the period for when any alert conditions should be checked (alert condition will be checked around midnight on the period of your selection). Available periods to choose from:
- Day – Sent every day around midnight.
- Week – Sent every Monday around midnight.
- Month – Sent every 1st of the month around midnight.
-
Select the method to send alerts via Email, Mobile or Slack.
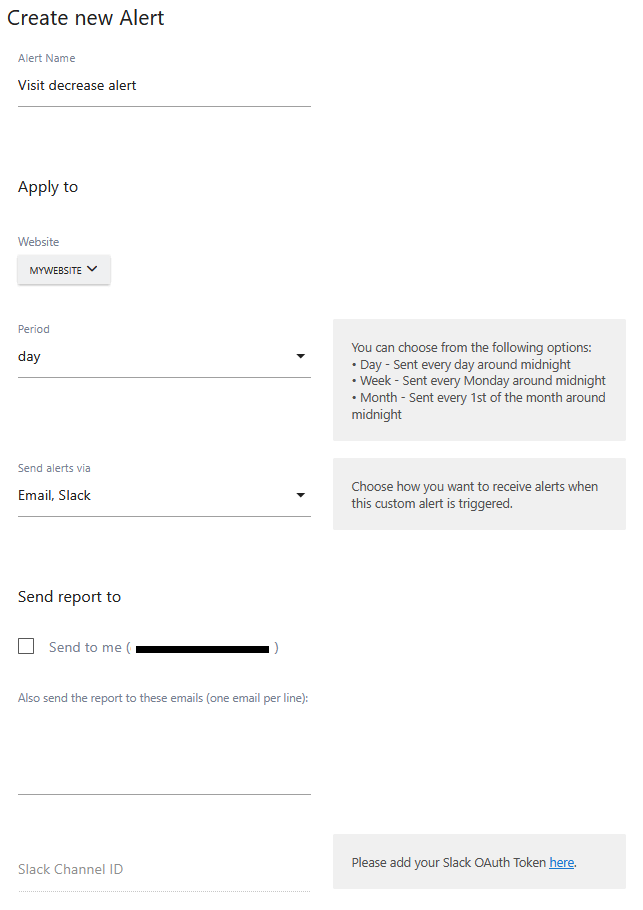
- Email: Click Send to me to receive the report. To include other recipients, add their email addresses (one per line)
- Mobile: You can only define phone numbers for Mobile alerts if you have configured the SMS gateway.
- Slack: This requires setting up the Slack integration. You will need to obtain the Slack OAuth Token, configure the Slack setup and provide the Slack Channel ID in the field below.
-
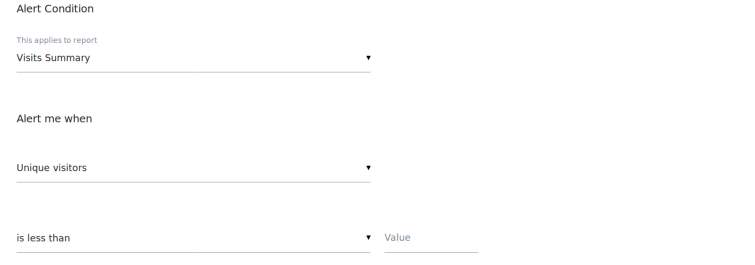
Choose the report under Alert Condition that you want to monitor
- Click on Save.
Things to know about Alert Condition
Alert Condition section is considered to be one of the important sections of Custom Alert configuration, where a report which needs to monitored can be specified. There are more than 70 reports to choose from (see our Analytics terms glossary for the complete list of reports).
List of Operators
- matches any (triggers an alert when the first matching row meets the condition defined under Alert me when)
- is
- is not
- matches regular expression
- does not match regular expression
- contains
- does not contain
- starts with
- does not start with
- ends with
- does not end with
Using these operators you can choose to be alerted depending on the label of a specific row of your report. The value lets you define which row’s label you want to monitor in the report.
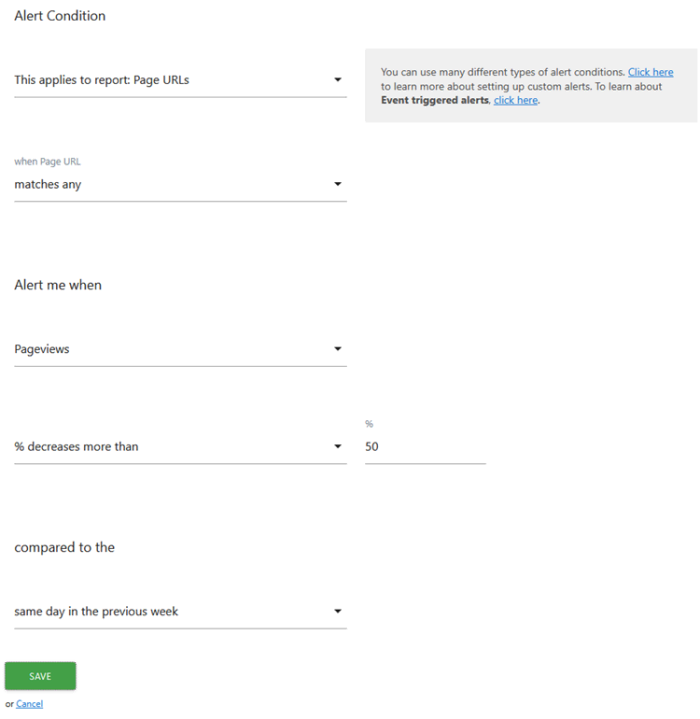
Example 1: You want to receive an alert when any tracked page experiences a 50% decrease in page views compared to the selected period. This allows you to monitor traffic drops without manually checking reports. Using the operator, matches any, ensures the alert is sent when at least one page meets the criteria.
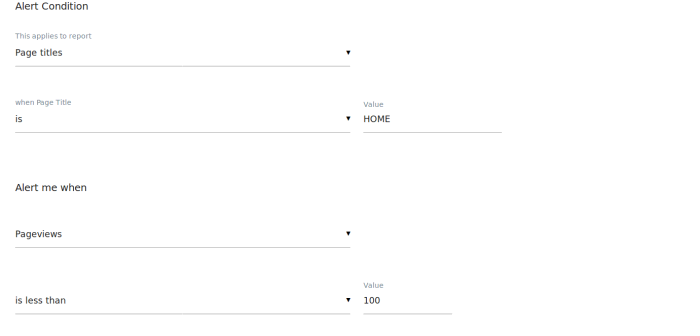
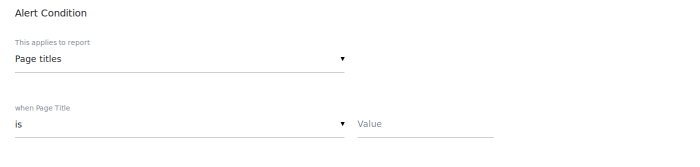
Example 2: If the title of your homepage is Home and you want to be alerted when your Homepage goes above or below a certain value (or increases or decreases by a certain value), you would select when Page Title is “Home”.
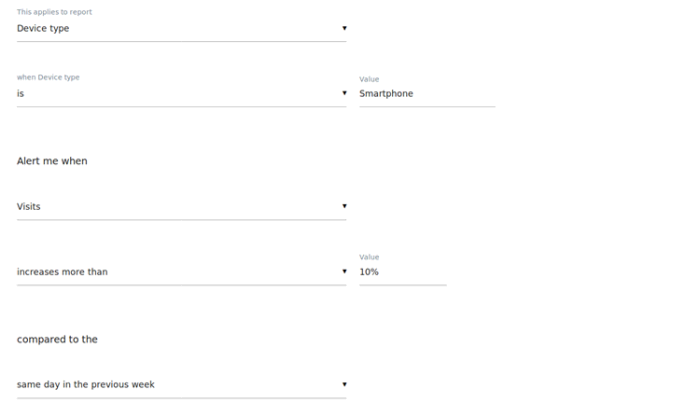
Example 3: If you wanted to be alerted whenever smartphone usage dropped or increased after an update, you would select: this applies to report Device type, When Device type is Smartphone, Alert me when Visits % increases more than 10% (compared to the same day in the previous week).
Things to know about Alert me when
In this section you specify which metric should be monitored and what change in this metric will trigger your custom alert. The available metrics will change depending on the report selected in “This applies to report”.
List of available Operators:
- is less than
- is greater than
- decreases more than
- increases more than
- % decreases more than
- % increases more than
For example, when Page Title is “Home”, select the Pageviews as a metric. You can now select an operator for the amount of pageviews to trigger the alert.