How to Export/Import a Tag Manager Container
Matomo Tag Manager lets you export a container’s configuration and import it into another site or environment. This is useful when you want to migrate configurations or restore a previous version. To duplicate containers, use the copy function instead of exporting and importing.
Before proceeding, note that importing a container overwrites all existing tags, triggers, and variables in the destination container. Always export your current configuration first as a backup.
Export a Container
- In Matomo, click on Tag Manager in the top menu.

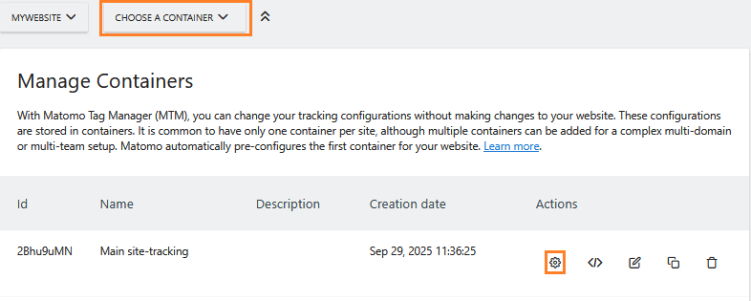
- In Manage containers, select the container to edit from the drop-down menu or click on the settings icon to open the container configuration.
- In the left menu, select Versions.
- At the bottom of the page, click Export Draft to export the configuration of the container you are currently working on. Read more about draft versions in Tag Manager.
- To restore a previous version of the container, identify the version in the list and click the export icon to download a JSON file containing the container configuration. You will then need to import the JSON file to restore that container version.
Import a Container
- In Matomo, click on Tag Manager in the top menu.
- In Manage containers, select the container to edit from the drop-down menu or click on the settings icon to open the container configuration.
- In the left menu, select Versions.
- At the bottom of the page, click Import and provide a new version name.
- Open the previously exported JSON file and copy its content. You will need to paste the configuration in the field, Paste the JSON formatted data that you exported previously.
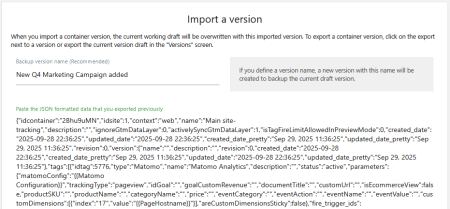
- Confirm the import by selecting the « Overwrite current draft with this version » button. This will restore the contents of your container into the new site.
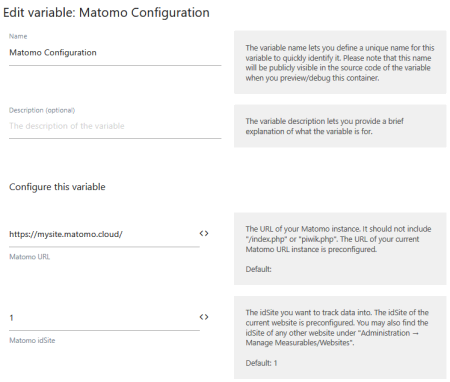
- Once the container has been imported, the last step is to edit the Matomo Configuration variable from the Variables section located in the left menu. The reason for this change is the previous siteID (if imported from another website) has been carried across with the exported container.
- In Tag Manager, go to Variables and update the variable settings to reflect the correct site settings for your new container/website.
If you are unsure what siteID your website is using, you can confirm this from the Administration > Websites > Manage section of your Matomo dashboard.
Tip: Creating a Template Container for Efficient Website Setup
In addition to the steps outlined in this FAQ, consider implementing a Template Website and Template Container strategy to streamline the process of setting up multiple websites with similar containers. Here’s how that could work:
- Create a Template Website and Container: Designate one of your existing websites as the Template Website and configure its container settings to represent the ideal default setup.
- Export Template Container Settings: Once your template container is configured, export its settings using the above FAQ for future use. This will capture the container’s configuration, allowing you to replicate it across multiple websites.
- Import Template Settings for New Websites: When creating a new website within Matomo, import the previously exported template container settings. This will automatically apply the predefined configuration to the new website, saving you time and effort.
By utilizing a template container, you can ensure consistency across your websites while minimizing manual setup efforts. This small tip can significantly enhance your workflow, especially when dealing with multiple websites with similar structures.