How do I trigger a tag when any DOM element which matches a CSS selector is clicked?
When you want to track interactions with elements like buttons and links, you can trigger a tag when a specific element of the page is clicked using a unique or CSS class. However, if these elements do not have an ID or CSS class, you can use a CSS selector that matches the element.
This guide explains how to create a trigger in Matomo Tag Manager that fires when a DOM element matching a CSS selector is clicked. It includes a simple example using an element type (e.g. all first-level titles <h1>). The example will be extended to demonstrate how to use attribute selectors, such as data-* attributes, to target elements on the page.
Create the trigger
Fist, we create the trigger that listens to clicks and specifies the CSS selector:
- In Matomo Tag Manager, go to Triggers.
- Click Create New Trigger and choose the All Elements Click trigger.
- Enter a descriptive name, e.g. Clicked on H1 as this example fires the trigger when the
<h1>title elements are clicked. - In the section, Only trigger when (optional), define the following condition: Click Element
matches the CSS selectorh1.
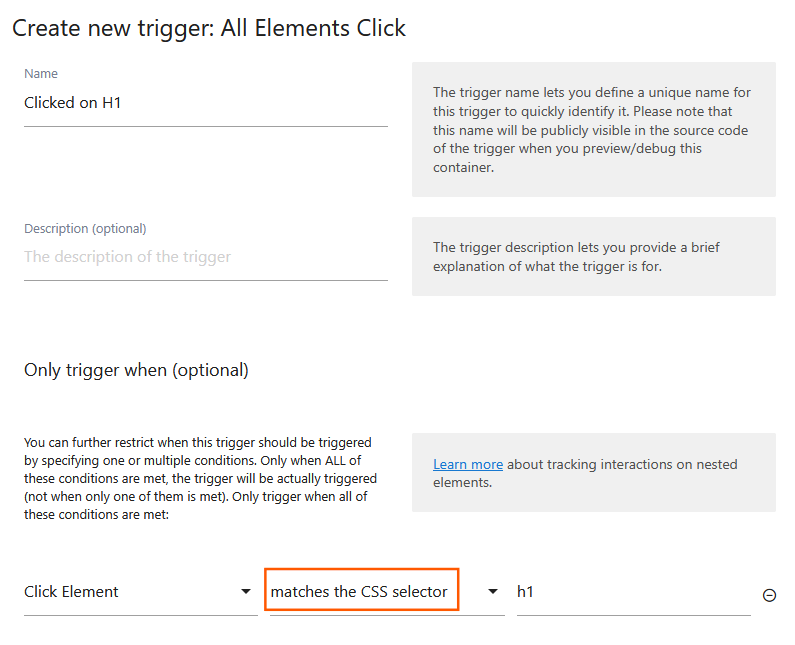
Note: There is also the option not matches the CSS selector.
Find the CSS selector for a given element of the page
To find the CSS selector for any element in the page, use your web browser’s developer tools.
- In most browsers, you can right-click on your element and select Inspect.
- The dev tools Inspector panel will open showing the DOM tree.
- Right-click on the element and click on Copy > CSS selector.
- Paste the value in the trigger condition value field: Click Element
matches the CSS selector.
Use data-* attributes as CSS selectors
In addition to targeting element types, classes, or IDs, you can also use custom data-* attributes in your CSS selector. Unlike classes or IDs, which developers may update for styling or functionality, data-* attributes can be reserved for tracking specific elements that remain stable over time.
For example: <button data-resource="budgeting-guide"> use the data attribute in the trigger condition: Click Element matches the CSS selector data-resource= »budgeting-guide »
If you want to capture the value of an element’s attribute and use it in your tag (for example, pass the text of a data-resource attribute or the alt value of an image into Matomo), explore the following guides:
* Using a Clicked Data Attribute variable (for data-* attributes)
* Using a Clicked HTML Attribute variable (for standard attributes like id, class, href, or alt)
Create the tag
Once you have created the Trigger, the next step is to create a Tag.
- In Matomo Tag Manager, go to Tags.
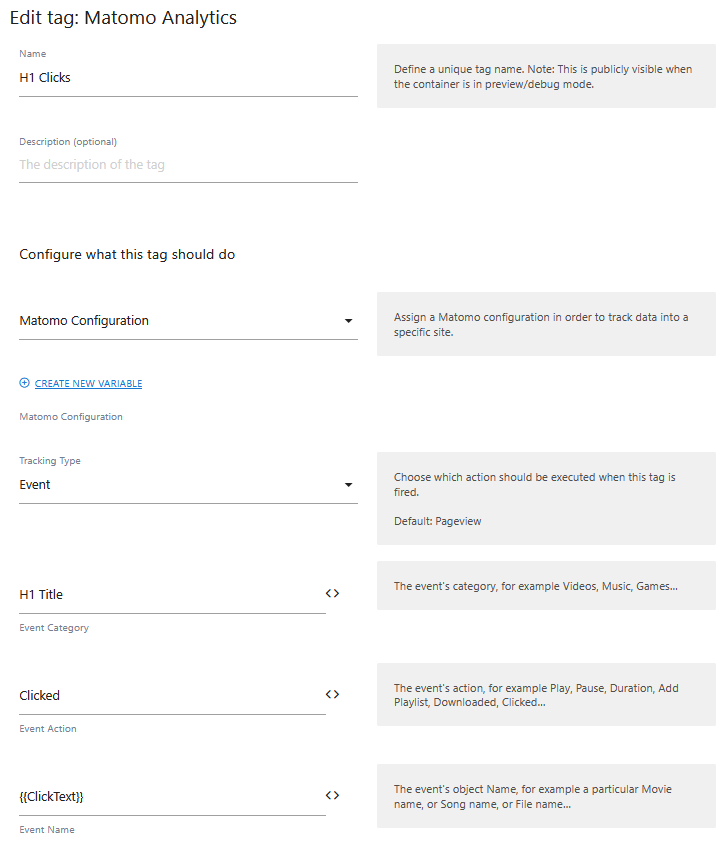
- Click Create New Tag and choose the Matomo Analytics tag.
- Provide a descriptive name and select the Tracking Type as Event (to track a custom event.
- Set the Event Category (e.g. H1 Title) and Event Action (e.g. Clicked).
- To get the value of the clicked element (text value), you can add the built-in variable
{{ClickText}}. - Click Create New Tag to save.
Publish the tag
Once the tag is created, the next step is to test the configuration.
- In Matomo Tag Manager, use the Preview / Debug mode to verify the triggers and tags fire when expected.
- Click Publish in the left menu.
- Name the version and click Create new version and publish release.
When a visitor clicks on any <h1> title in your pages, an event will be tracked in Matomo.
Using CSS selectors in Matomo Tag Manager gives you flexibility to track interactions on almost any element, even when IDs or classes are not available.