How to configure the Google Consent Mode Tag in Matomo Tag Manager
The Google Consent Mode tag in Matomo Tag Manager lets you control the tracking behaviour of Google tags implemented in your Matomo container. When integrated with a certified Consent Manager Platform (CMP), the Google Consent Mode tag ensures that each Google service adapts its tracking based on the user’s consent choice.
Note: The Google Consent Mode tag does not collect consent from users on its own. You will need a CMP to collect valid consent and push consent update events.
If your site targets users in the EEA, UK, or Switzerland and Matomo triggers any Google advertising or analytics services (for example GA4, Customer Match, or Ads Data Hub), the Consent Mode tag must be setup in Matomo Tag Manager.
The Consent Mode tag should deny all consent types by default for users in the EEA, UK, or Switzerland until they provide explicit consent through a CMP. Review the countries your site targets to determine if consent is required for your implementation.
When to use the Google Consent Mode tag
When using Google-based tags in Matomo Tag Manager, implement the Google Consent Mode tag with a Google-certified consent management platform (CMP) to block/enable Google tags based on consent denied/given. The Consent Mode tag defines the default consent status (before consent given, denied) and the update consent status (after consent granted or denied).
If the Consent Mode tag is not used with other Google tags in MTM, Google will assume consent is granted (or automatically denied by the CMP if implemented) and tracking behaviour is not adjusted.
Using Google Consent Mode in Google Tag Manager and Matomo Tag Manager
Each tag container in MTM and Google Tag Manager (GTM) is independent and Google services do not automatically share consent signals across containers.
- If MTM fires Google tags, then use the built-in Google Consent Mode tag to ensure Google tags loaded via MTM respect the user’s consent.
- If GTM fires Google tags, then use the GTM tags’ built-in consent settings to ensure Google tags loaded via GTM respect the user’s consent.
To maintain compliance and consistent behaviour across your site, it is recommended to implement Consent Mode wherever Google tags are loaded.
Google Consent types and states
The Google Consent Mode tag supports the following consent types (based on the Google consent mode reference)
| Consent Type | Description |
|---|---|
ad_storage |
Enables storage (such as cookies or device identifiers) related to advertising. |
ad_user_data |
Sets consent for sending user data to Google for online advertising purposes. |
ad_personalization |
Sets consent for personalised advertising. |
analytics_storage |
Enables storage (such as cookies or device identifiers) related to analytics. |
functionality_storage |
Enables storage that supports website or app functionality. |
personalization_storage |
Enables storage related to personalisation features. |
security_storage |
Enables storage related to security, authentication, and user protection. |
Each type represents a specific purpose for data collection and can be set to one of two states:
- granted: The user has given consent for this type of data to be collected.
- denied: The user has not given consent, so tracking must occur without cookies or be disabled.
The Google Consent Mode tag in MTM is not used for data uploads directly. However, when uploading user data to Google (e.g., offline sales, CRM data), you must ensure that consent was obtained and that the consent state for ad_user_data and ad_personalization was recorded and sent to Google using an appropriate mechanism, such as via Consent Mode v2 or a Google Ads API parameter.
Configure the Google Consent Mode tag in MTM
- Open your Matomo Tag Manager container and navigate to Tags.
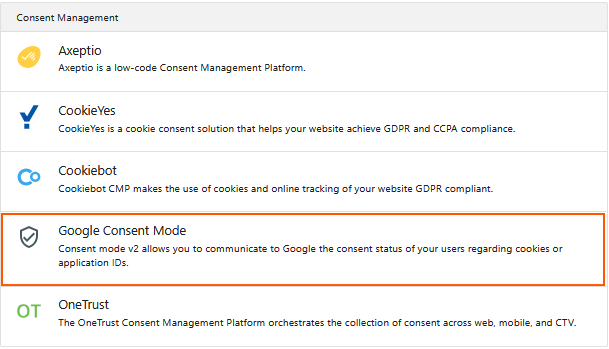
- Click Create New Tag and choose Google Consent Mode.
The Google Consent Mode tag relies on two types of signals to determine how Google tags should behave based on the user’s consent. You need two Google Consent Mode tags for each mode:
- Default mode: One
defaultmode tag sets all consent types todenied(or your preferred default aligned with applicable privacy laws) before the user interacts with your consent banner. - Update mode: One or more
updatemode tags change specific consent types tograntedbased on accepted categories.
Without both signals, Google services will automatically track with cookies (if not blocked by the CMP) and Google tags will not react to user consent changes if update mode is missing.
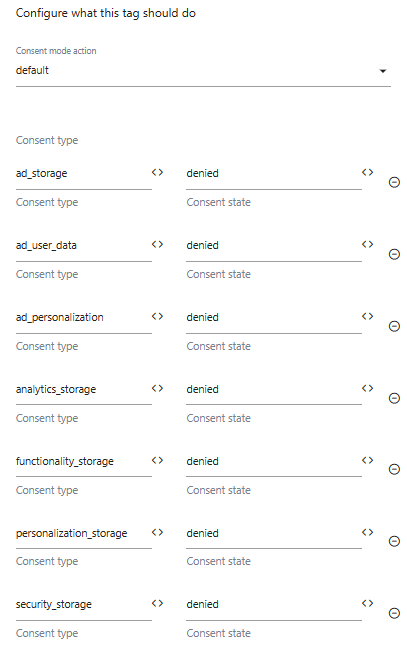
Set up Consent Mode tag 1: Default (on page load)
- Set the Consent mode action to default.
- Add the required Google consent types with the Consent state set to
denied(or your preferred consent state).
- Link a Pageview trigger to fire the tag when the page loads.
- Click Create New Tag to save.
- When the tag fires on page load, the consent object default is created in the
dataLayer.
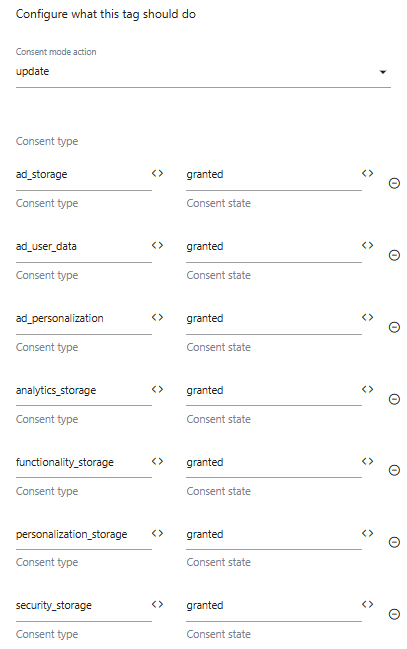
Set up Consent Mode tag 2: Update (after user gives consent)
- In Tags, create another Google Consent Mode tag.
- In the configuration page, set the Consent mode action to update.
- Use the same Google consent types added in Tag 1 and set the Consent state to
granted(or your preferred consent state when the user changes the default consent state).
- Create new triggers on-the-fly by clicking the Create new trigger link. Create a Custom Event trigger to fire the tag when the CMP pushes a consent
updateevent. - Depending on your CMP configuration, you may need to create a trigger for each defined category, e.g., Performance, Targeting, and Functional. This example uses an integration with the CookieScript CMP where the
Performancecategory is used by default for analytics andTargetingis used for marketing. - Provide a name, for example ‘Consent Mode Update-Performance’. This trigger fires the consent tag when consent updates are received for the Performance category.
- Enter the Event Name that must occur to execute this trigger. For example, CookieScript pushes the event
CookieScriptCategory-performancewhen consent is granted for thePerformancecategory. -
To find your CMP’s event name, open the browser’s developers tools. Use the CMP widget to grant/deny consent and in the Console, type
dataLayerand pressEnter. View the events pushed by your consent manager and identify which events correspond to consent updates. Apply these event names to the custom triggers.

-
Click Create New Trigger to save and return to the tag configuration page.
- Save the new tag. When the tag fires on consent change, the consent object update is created in the
dataLayer.
You can assign additional triggers for other categories. Repeat the custom trigger set up steps for each category event you want to track consent updates for (Performance, Targeting, Functional).
Update Google tags in MTM
To prevent Google tags from firing before consent is granted, update their triggers so they fire only after the relevant consent event occurs.
- In your Matomo Tag Manager container, go to Tags.
- Select your Google-based tag (for example, Google Ads Conversion or Google tag).
- Scroll to the section Configure when the tag should do this.
- Remove any existing triggers such as Page View (All Pages), DOM Ready, or Window Loaded.
- Assign the same Custom Event trigger used for your Consent Mode – Update tag (see setup for tag 2). This trigger should fire only after the CMP signals that consent has been granted.
- Save the tag.
- Repeat this process for every Google-based tag in the container.
- Publish the container.
Test the configuration
Once your Google Consent Mode tags and Custom Event triggers are configured in Matomo Tag Manager, you can test the tracking behaviour for different regions to validate your privacy compliance setup.
- To simulate different locations, use a VPN during testing.
- Use the Preview and Debug mode in Tag Manager.
- Open your browser’s developer tools > Console tab. Use the CMP widget to decline or accept different categories (e.g., Performance, Targeting) to test both default and update behaviour.
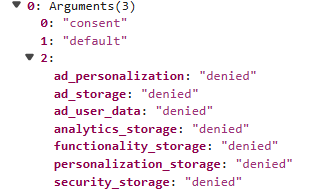
- Type
dataLayerin the Console and pressEnterto inspect the events pushed by your CMP. - Look for a consent object with
"default"with all consent types set to"denied"(this should appear before user interaction).
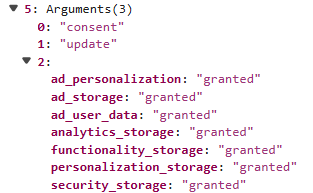
- After granting consent, look at the
dataLayerfor a consent object with"update"and the consent types are set to"granted".
Troubleshooting Tips
- No consent object in the dataLayer: Confirm the Google Consent Mode – Default tag fires on page load and that the CMP loads before other Google tags.
- Consent Mode – Update not firing: Ensure the Custom Event trigger exactly matches the event name pushed by the CMP. Inspect the
dataLayerto verify the spelling. - Google tags firing before consent: Replace Page View, DOM Ready, or All Pages triggers with the Custom Event trigger used for the Consent Mode – Update tag.
- Cookies set before consent: Verify that the CMP blocks Google tags and related cookies until consent is granted.
After publishing the container, verify the implementation in the browser. Use DevTools to confirm that Google network requests include consent parameters and that no Google tags fire before consent is granted.