Import Google Search keywords in Matomo
The Search Engine Keywords Performance premium feature enables Matomo to import search keyword data from Google Search Console. You can combine keyword data with Matomo analytics reports to analyse which queries drive impressions, clicks, and traffic to your website.
This premium feature is included in Matomo Cloud. If you are using Matomo On-Premise, you can get Search Engine Keywords Performance on the Marketplace.
To use the Search Engine Keywords Performance, you will need to complete the following steps covered in this guide:
- Set up Google Search Console and verify your website.
- Create the Google OAuth Client config to get your OAuth config.
- If you are using Matomo for WordPress, go to WP Admin Dashboard > Matomo Analytics > Reporting before proceeding with the following steps.
- Once the Google OAuth Client is set up, login to Matomo as a Superuser.
- Navigate to Administration
 > System > Search Performance.
 - Below Google Search Console, click Setup Configuration.
- Upload the OAuth credentials.
- In the Connect Google Account(s) section, click Start oAuth process.
- Now you can configure your websites to import keywords in Administration > Websites (or Measurables > Manage.
How to set up Google Search Console and verify your website
Google Search Console is a free service offered by Google that helps you monitor and maintain your site’s presence in Google Search results.
To import your Google Search Keywords in Matomo, you need to sign in to the Google Search Console and check your website is verified. You will need an active Google account to complete this process.
- Sign in to Google Search Console.
- After signing in, you can add a property from the Search property dropdown located in the top left.

- You will then be presented with two options: ‘Domain‘ or ‘URL prefix‘.
–Domain: This option includes all subdomains (e.g.,m.,www.) and multiple protocols (e.g.,http,https,ftp). It covers a broader scope of your website.
–URL Prefix: This option includes only URLs with the specified prefix, including the protocol (e.g.,http/https). It focuses on a specific subset of your website’s URLs.

- Choose the option that accurately reflects your website by entering either the domain or URL. You will then receive specific instructions on how to verify your chosen domain. The verification method will vary depending on the option you have chosen.
- The verification process may involve adding a DNS record to your domain name or uploading an HTML file to your web hosting. Follow the on-screen instructions accordingly.

- Once your website is verified, you can proceed with setting up the Google Search Keywords import.
Create the Google OAuth Client Config
![]()
You do not need to submit your application to Google for verification at any point in this process. If Google prompts you to submit the app and you cannot cancel or decline the request, it usually indicates a missed step or added information that triggered Google’s verification workflow. Review this guide carefully.
If at any time you need to make changes to the OAuth Configuration,download the new OAuth Client credentials and upload them to Matomo for the changes to work. Follow these steps to get your OAuth Client Config and use the Matomo Google Search Integration:
1. Create a project in Google Cloud Console
- Sign in to the Google Cloud Console and open the project selector.

- Click the New Project option.
- Provide a project name (for example, SearchKeywords) and click Create.
- A notification will appear. Click Select Project to open the new project.
- After your project has been created, it will automatically open the project.
2. Enable the Google Search Console API
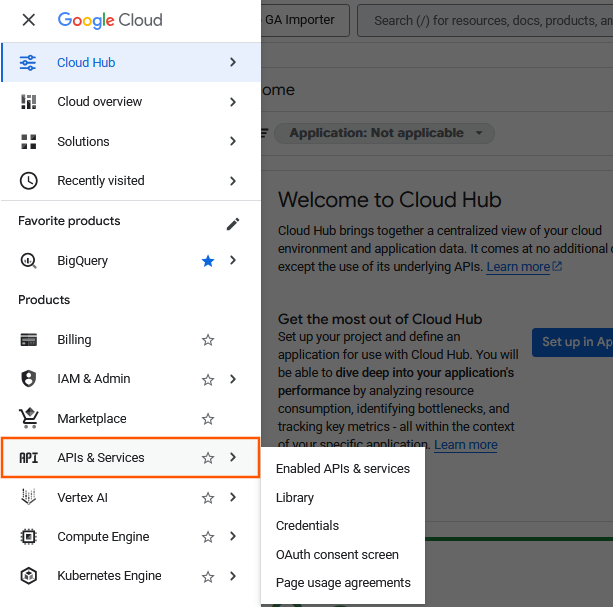
- Open the main Google Cloud menu and go to Products – APIs & Services.

- Click Library and search for ‘Google Search Console API’.
- Select the API and on the product details page, click Enable.
3. Setup the OAuth consent screen
- Open the Google Cloud menu and go to Products – APIs & Services > OAuth consent screen.
- Click Get started to go through the project configuration wizard.
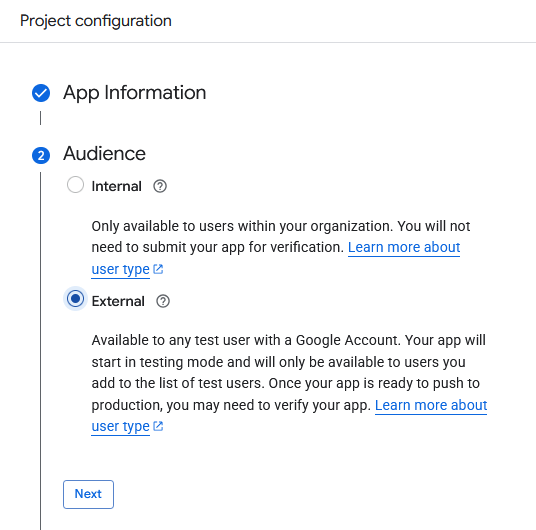
- Enter the App Information (name and email) and click Next.
- Select the Audience: Internal or External. If you create an External app, it will start in testing mode; if you create an Internal app, you do not need to submit the app for verification.

- Internal apps do not have a 7 day expiry time and you only have to authorise Matomo once. Note that internal apps are only available to users that have purchased Google Workspace to run imports from Google Analytics.
- External apps can be created by anyone. For most cases, we recommend creating a published, external app to ensure import works seamlessly. If you do not publish it, Google limits authorisation to seven days. After that, the authorisation expires and you must manually re-authorise Matomo every seven days until the import finishes.
- Complete the required details and click Create.
- Go to OAuth Overview > Audience to add Test users.
- Click Publish App under Publishing Status.
- In the popup, click Confirm to push to production.
4. Create the OAuth client
- In the OAuth Overview, click Create OAuth Client.
- Select Web Application as the Application Type.
- Set a name for the application, for example Matomo at https://matomo.my-website.example.
- Click on Add URI under Authorized JavaScript origins and set it to your Matomo URL domain for example:
https://matomo.my-website.example
Note: This needs to be a domain. If you have installed Matomo into a subdirectory, you need to enter the domain without the path. (sohttps://my-website.examplein case ofhttps://my-website.example/matomo/). - Click on Add URI under Authorized redirect URIs. This needs to be set to your Matomo URL with this special URL/query
/index.php?module=SearchEngineKeywordsPerformance&action=processAuthCodeadded at the end.
For example:https://matomo.my-website.com/index.php?module=SearchEngineKeywordsPerformance&action=processAuthCode
 .
.
Note: the URLs above are HTTPS: we highly recommend you run your Matomo instance over SSL. If your Matomo doesn’t support https yet, you can replace the URL and use http.
If you are using Matomo for WordPress: the URL must begin with the entire path to Matomo’s admin page, eg, http://mysite.com/wp-content/plugins/matomo/app/index.php?module=SearchEngineKeywordsPerformance&action=processAuthCode
Note: The URL for Matomo does not have to have a subdomain, that is just an example.
- Once you have entered the two URIs, click Create to finish creating the OAuth Client Credentials.
- You will be presented with the OAuth credentials that were just created. Click on DOWNLOAD JSON to download the OAuth credentials.

Note: If you change any settings above at a later point for example to fix a typo in one of the values, you will need to download the OAuth client credentials again and re-upload it in Matomo.
The steps in creating your OAuth Client Configuration are now complete. The ‘app’ that has been created during this process can remain as a ‘Testing’ or ‘Test Phase’ app without any need to submit it for review.
You might still get a warning from Google when completing the OAuth process saying « Google hasn’t verified this app ».
In this case, you can safely continue by clicking on Advanced, and then Go to matomo.cloud (unsafe) or Go to yourdomain.com (unsafe)
You’re all set! Your Google keywords will be imported in the new Matomo Search Keywords report.